Revision History
Initial Release: November 2021 (MR)
Introduction
This document contains instructions on how to update the Kinetic Control software running Pocket NC machines.
If you have any questions about how to use this tutorial, please contact us here.
Release Notes for Software Versions
Please see the table on this page for all of the software versions, their release notes and their release date.
Tools Needed
Ethernet cord
Ethernet port with internet access
Pocket NC Machine (connected and powered on)
Section 1: Software Update
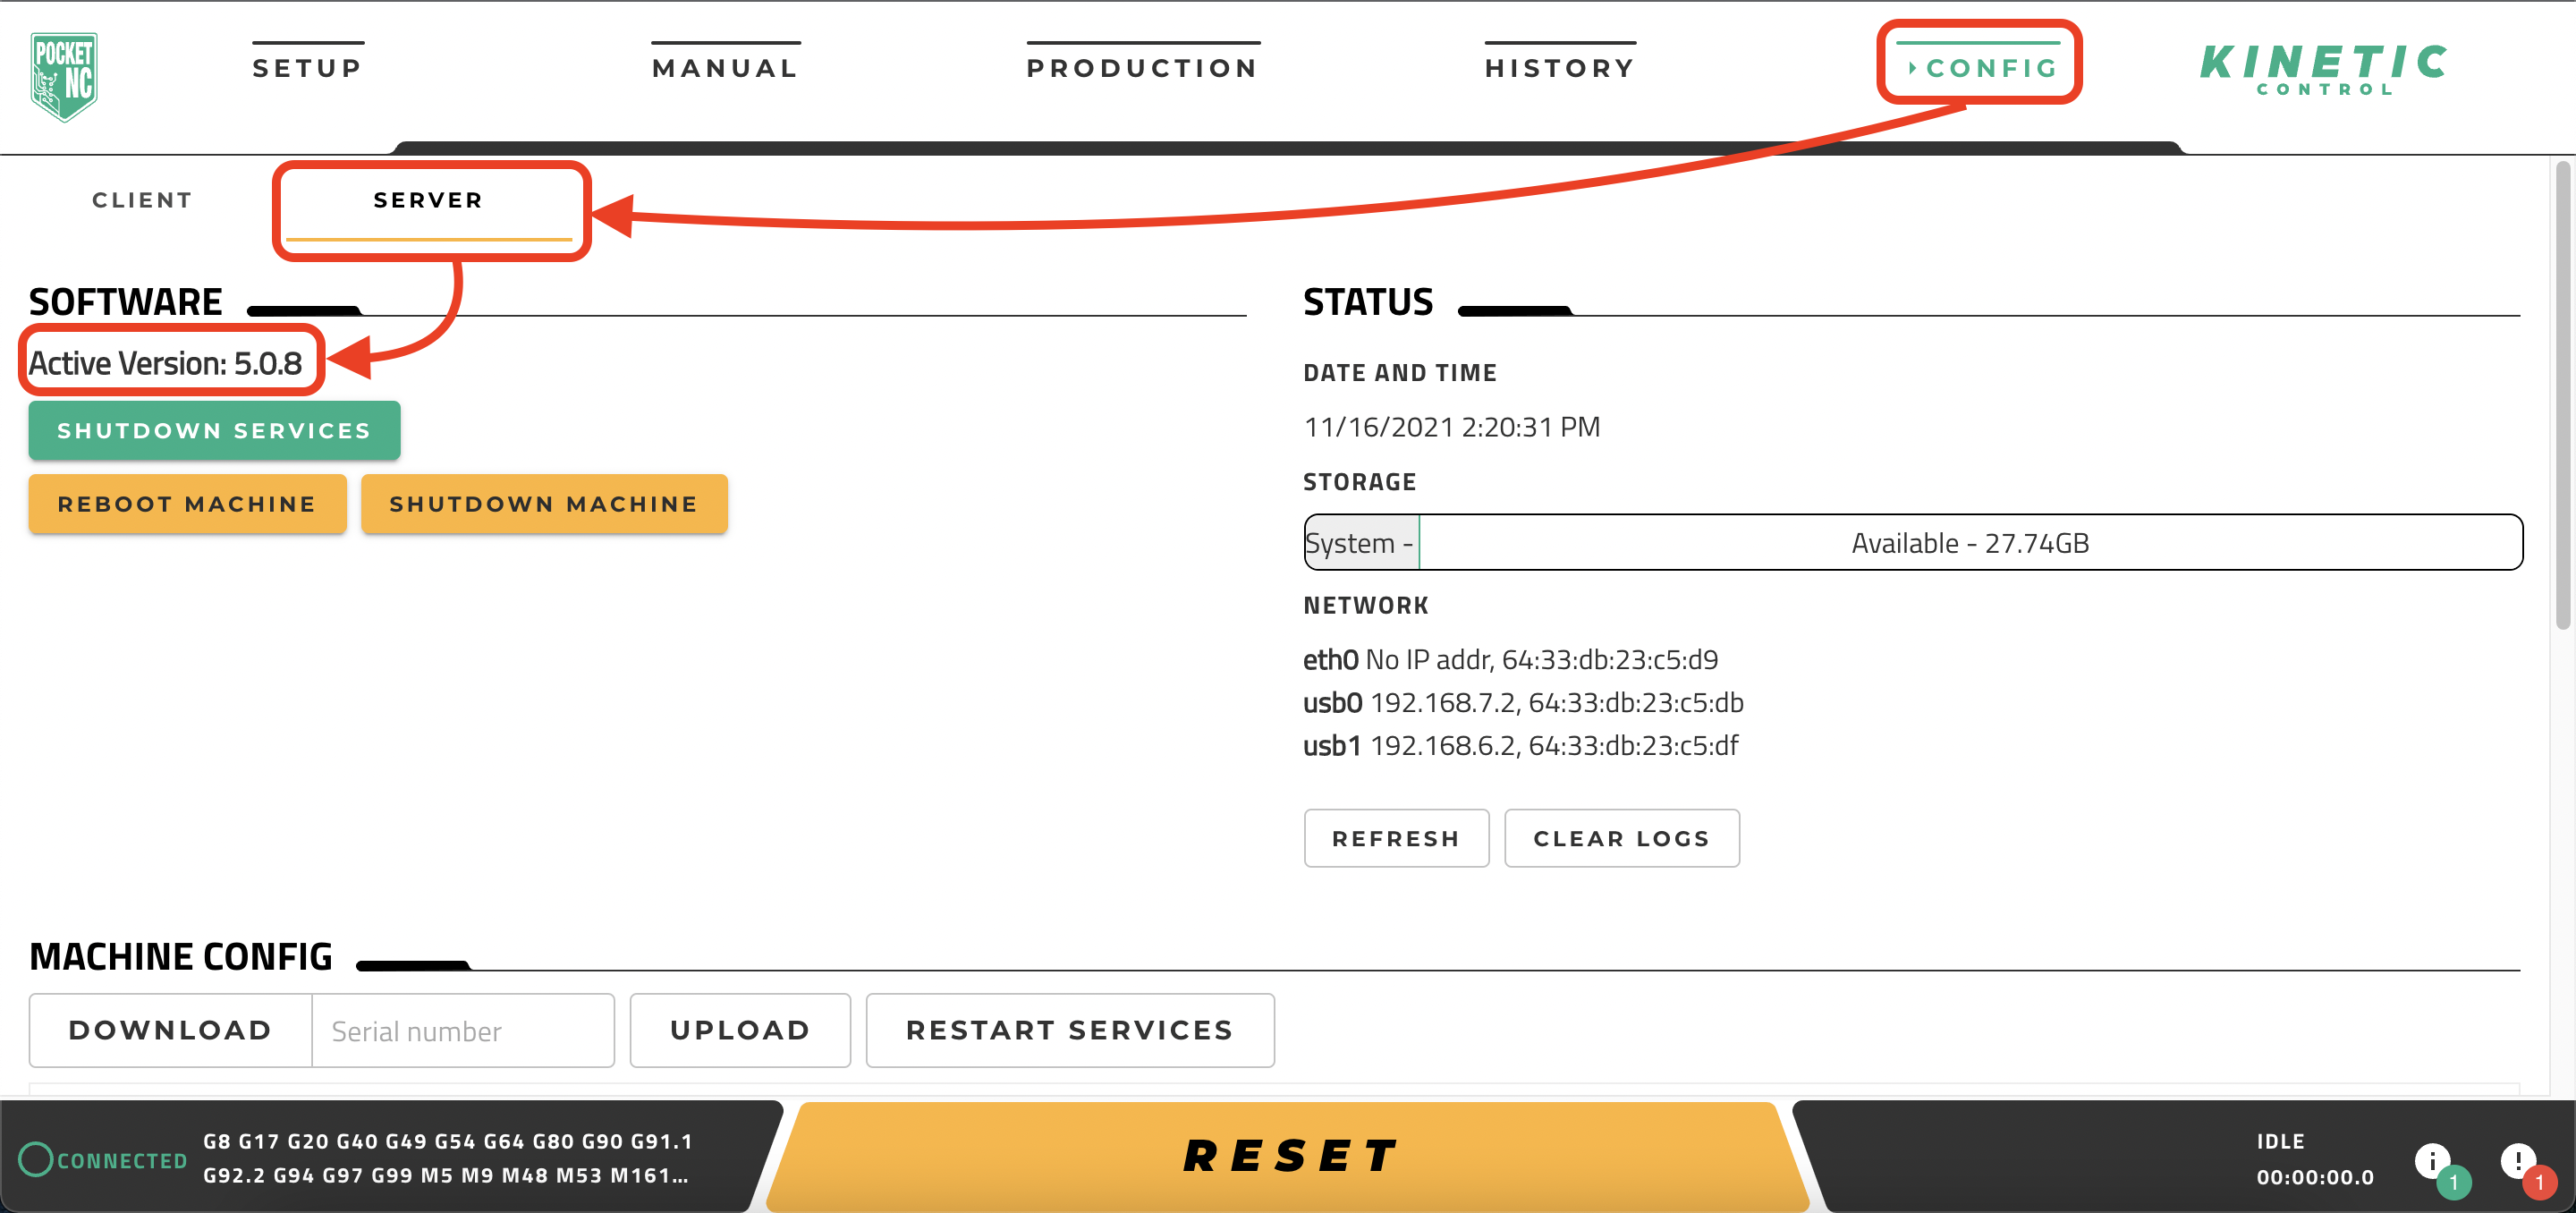
You can check the current version of the software that you are running by opening the user interface and going to the CONFIG > SERVER tab. Under the SOFTWARE heading, your currently active version will be listed as “Active Version: X.X.X”:
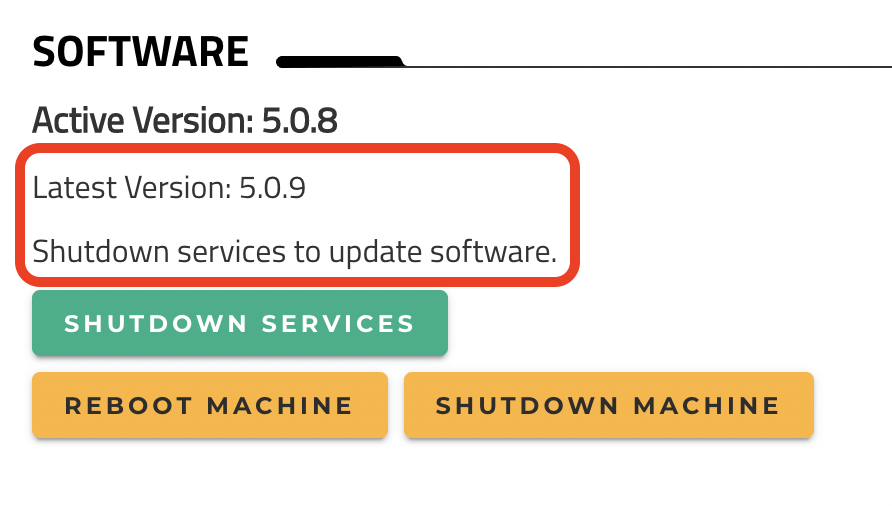
If you are running an earlier version of the software than the most recent update listed in this table, it is strongly recommended that you update to remove any bugs and gain additional software features.
Begin by plugging an ethernet cord that is connected to internet access into the ethernet port on the front of the machine. You should see green and yellow LED’s light up next to the port when the machine detects an internet connection. Refresh the browser after connecting to the internet. If the internet connection is made your screen will now look like the following picture, listing the “Latest Version: X.X.X” as well as “Shutdown services to update software”. If you do not see these scripts, check your firewall settings and ensure the internet is available to the machine.
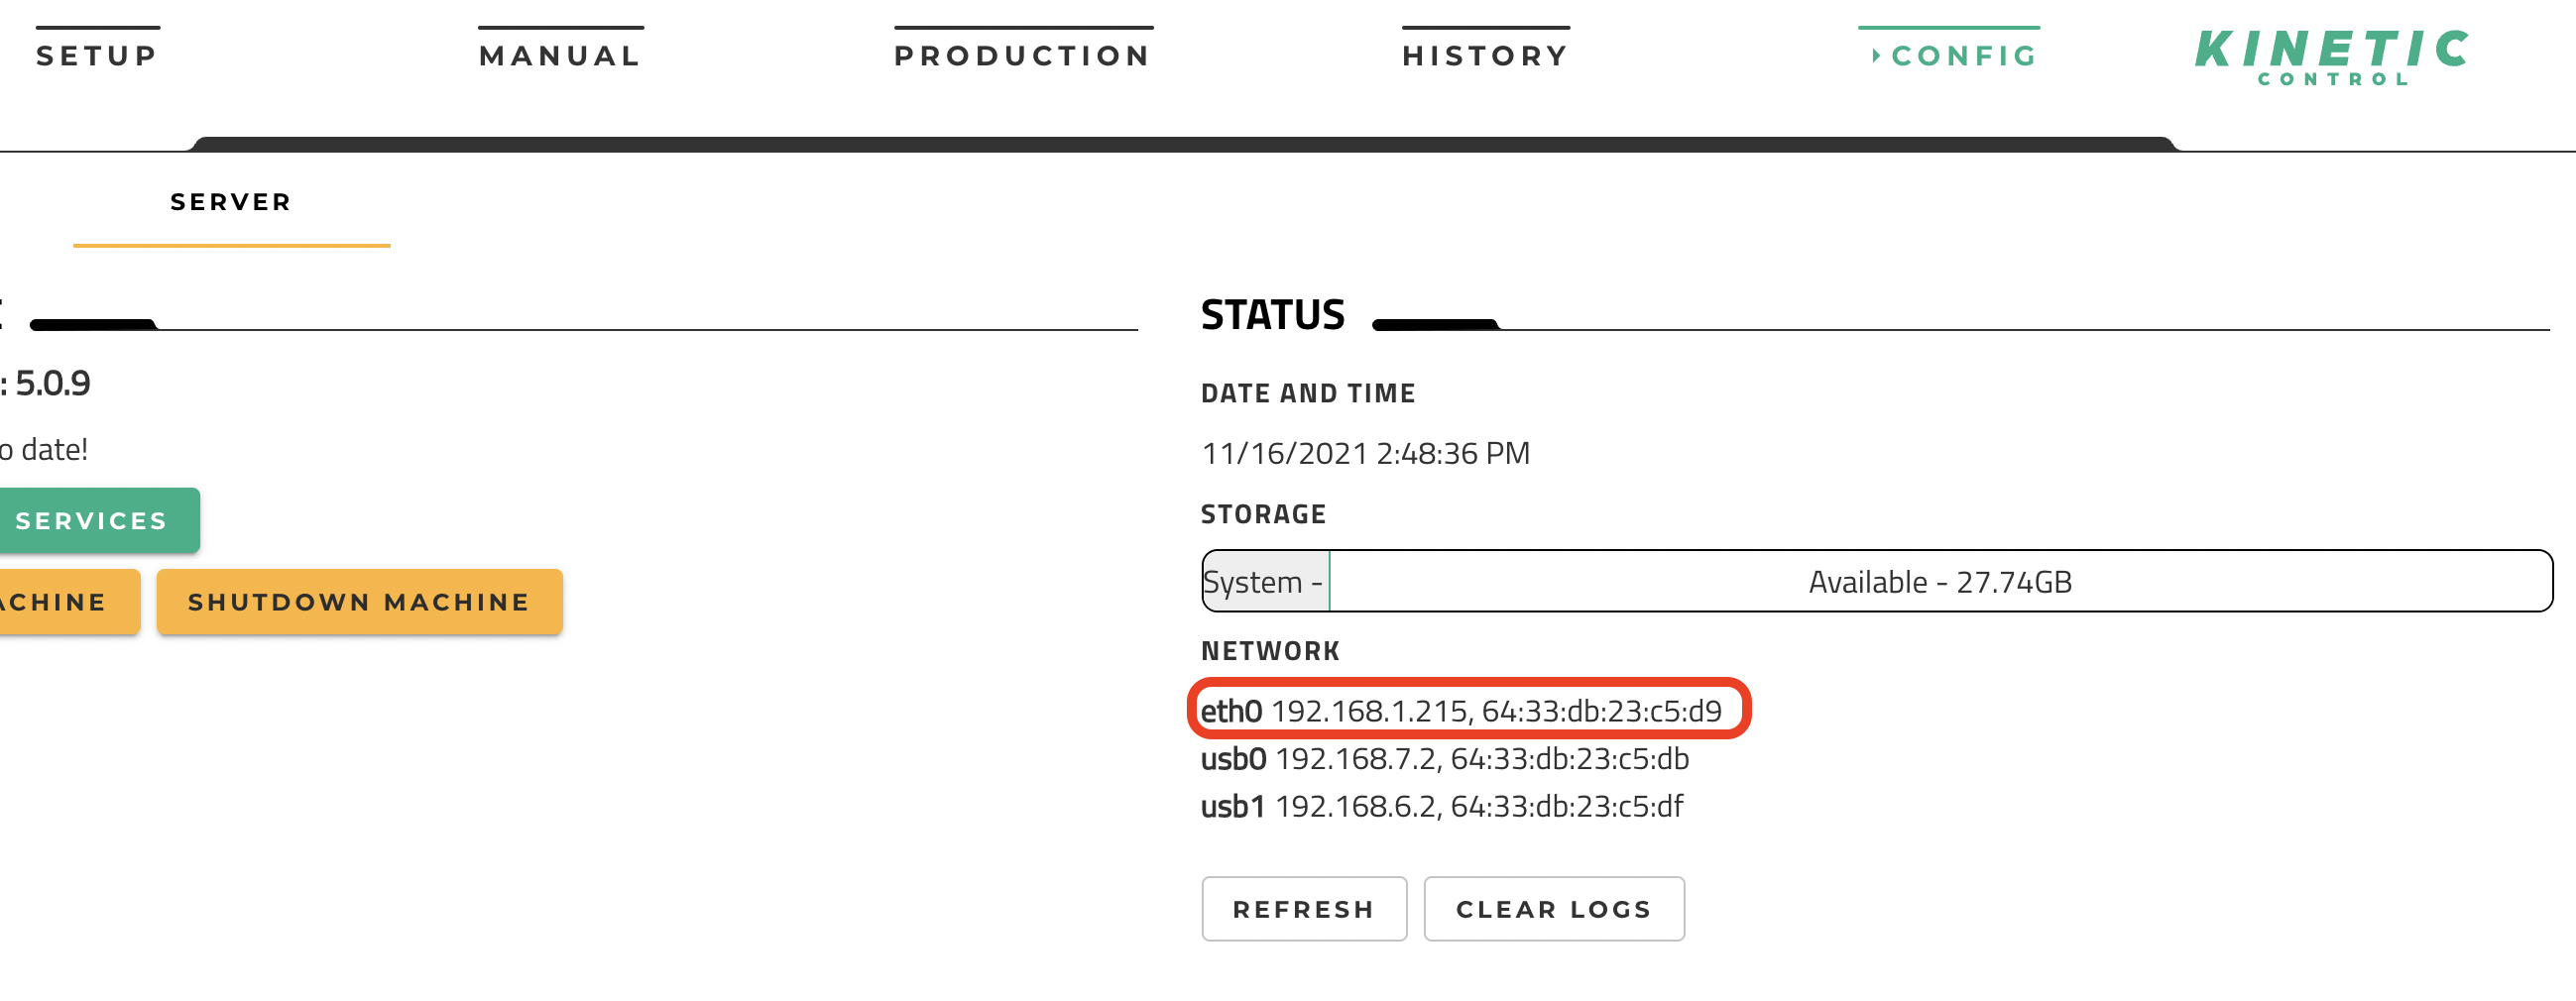
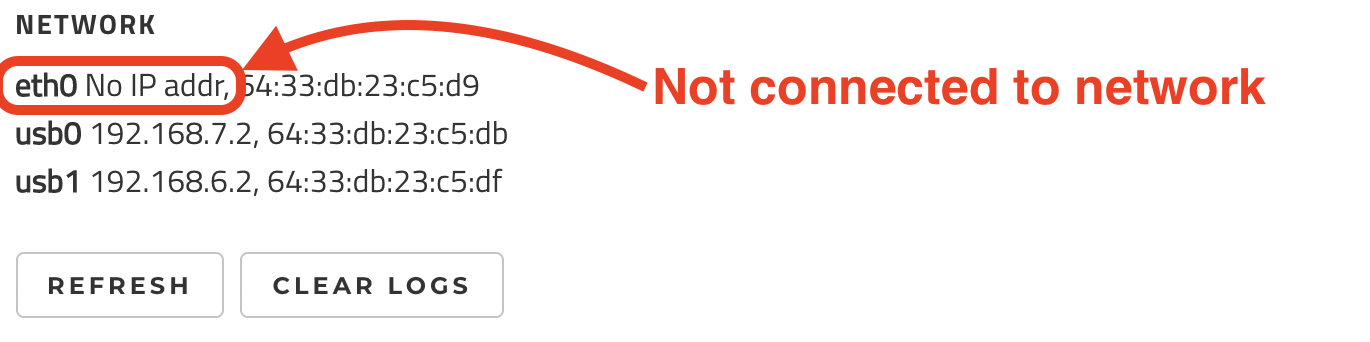
You can also verify your ethernet connection by looking at the STATUS section under NETWORK. The “usb#” rows will list the standard IP addresses for the User Interface (192.168.7.2 for Windows, 192.168.6.2 for Mac) and the “eth0” row will show the IP address assigned to your machine by your network. (If your machine is not successfully connected to the network, it will say “No IP addr”
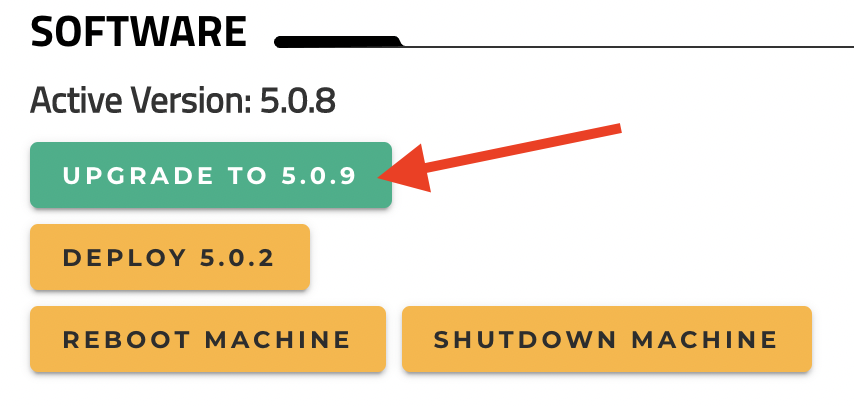
Once the Latest Version is displayed, select the SHUTDOWN SERVICES button. You will see a pop-up notification letting you know the machine has lost connection and after a few seconds the buttons under the SOFTWARE section will change, giving you the option to “UPGRADE TO X.X.X”. Press this button to upgrade:
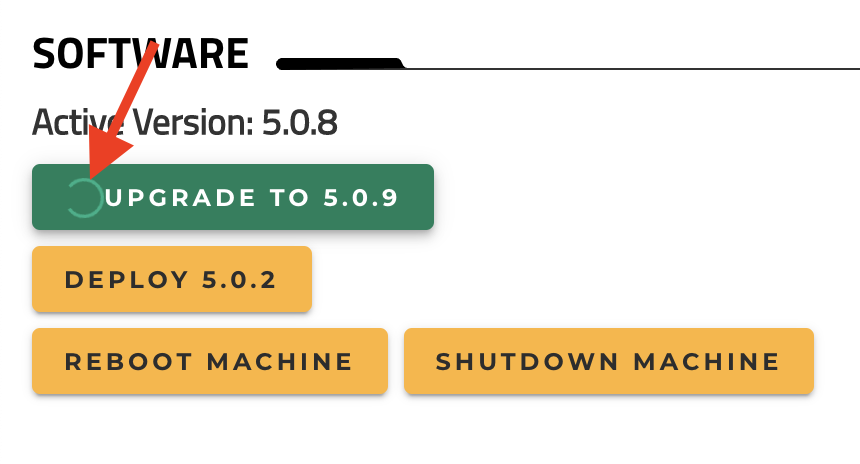
The machine will remain disconnected as the upgrade takes place. If you hover your mouse over the upgrade button, you will see the status wheel turning:
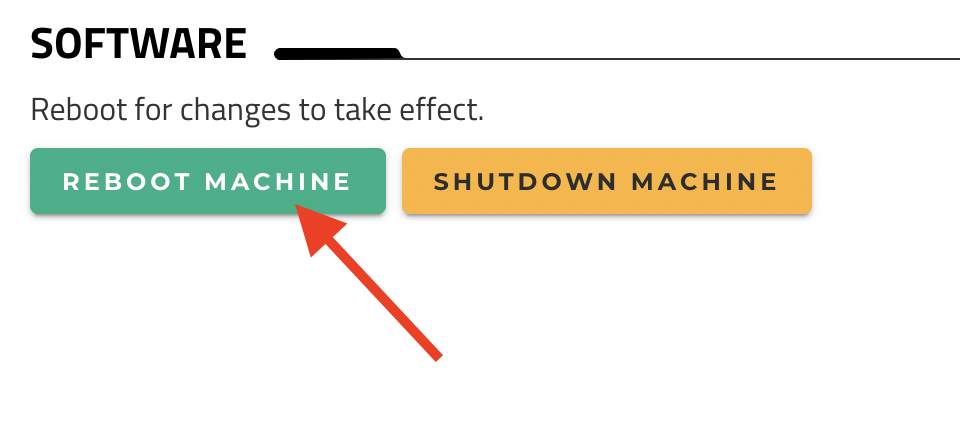
Once the upgrade has taken place, you will need to press the REBOOT MACHINE button to initialize the changes and reconnect to the machine:
While the machine is fully rebooting, it will say “Not connected to Update Server” and the lower lefthand corner of the UI will say “DISCONNECTED”:

Depending on how many changes were made, the full reboot can take a few minutes. The machine will not be fully reconnected until you see the green “CONNECTED” status in the lower lefthand corner of the UI:
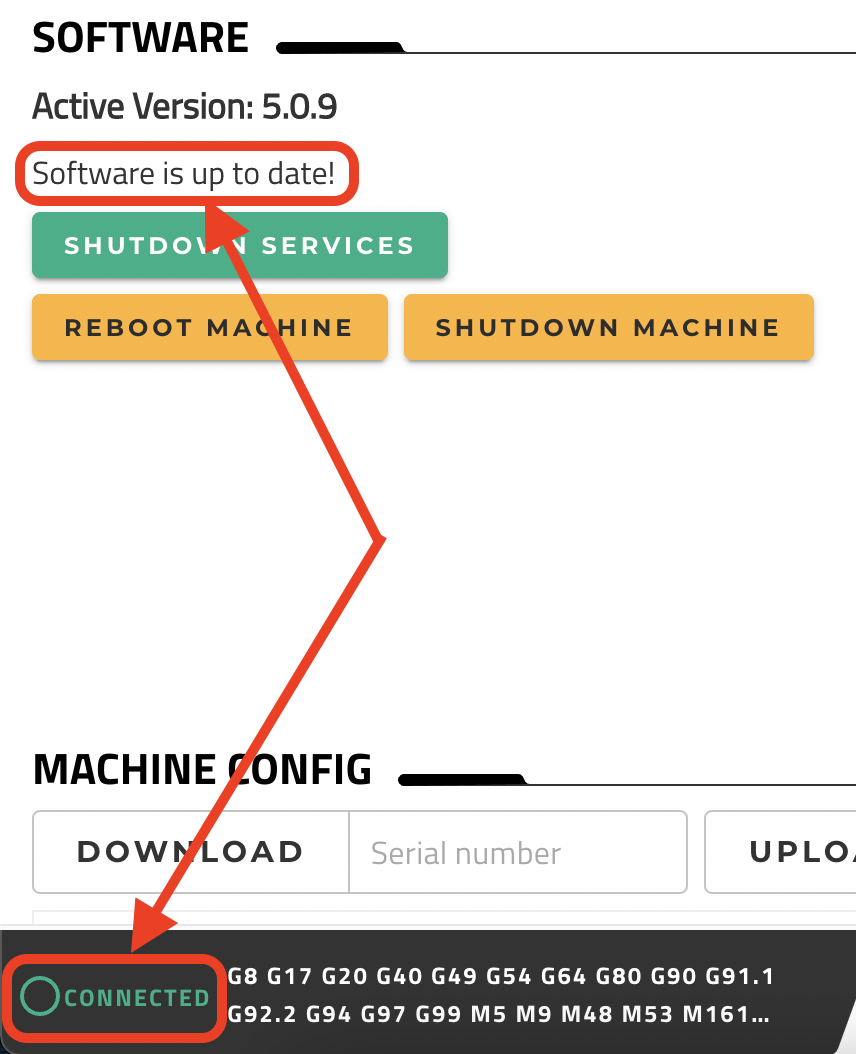
Congratulations, your software should now be fully updated with the latest features and patches! If you have any questions during this process or experience issues, please reach out to our Applications Engineers using this form.