Revision History:
11/19/19 - First Release (QR)
3/13/20 - V1.1 (QR) - Added USB connection method
There are many advantages to connecting the Pocket NC to a network. The steps below line out the general process of connecting the Pocket NC to a network when a USB connection cannot be established. If a USB connection be established as described in the Quick Start Guide that came with the machine, please skip to Step 4.
Note: Depending on your exact network setup, this process may require alterations to the steps laid out or additional steps.
Step 1: Download and Install an IP Scanner
An IP scanner will be needed to identify what IP address gets assigned to the Pocket NC once it is connected to the network.
The IP scanner used in the rest of these instructions is called “Angry IP Scanner” and can be downloaded here - https://angryip.org/ - for Mac, Windows and Linux.
Step 2: Computer Network Connection
The computer that you wish to control the Pocket NC with will need to be connected to your local network.
This connection can be wired or wireless, as long as your computer can be connected to the same network as the Pocket NC.
Step 3: Your Network’s IP Address
In order to find the IP address that has been assigned to your Pocket NC once it has been plugged in, you will need to know the IP address assigned to your network.
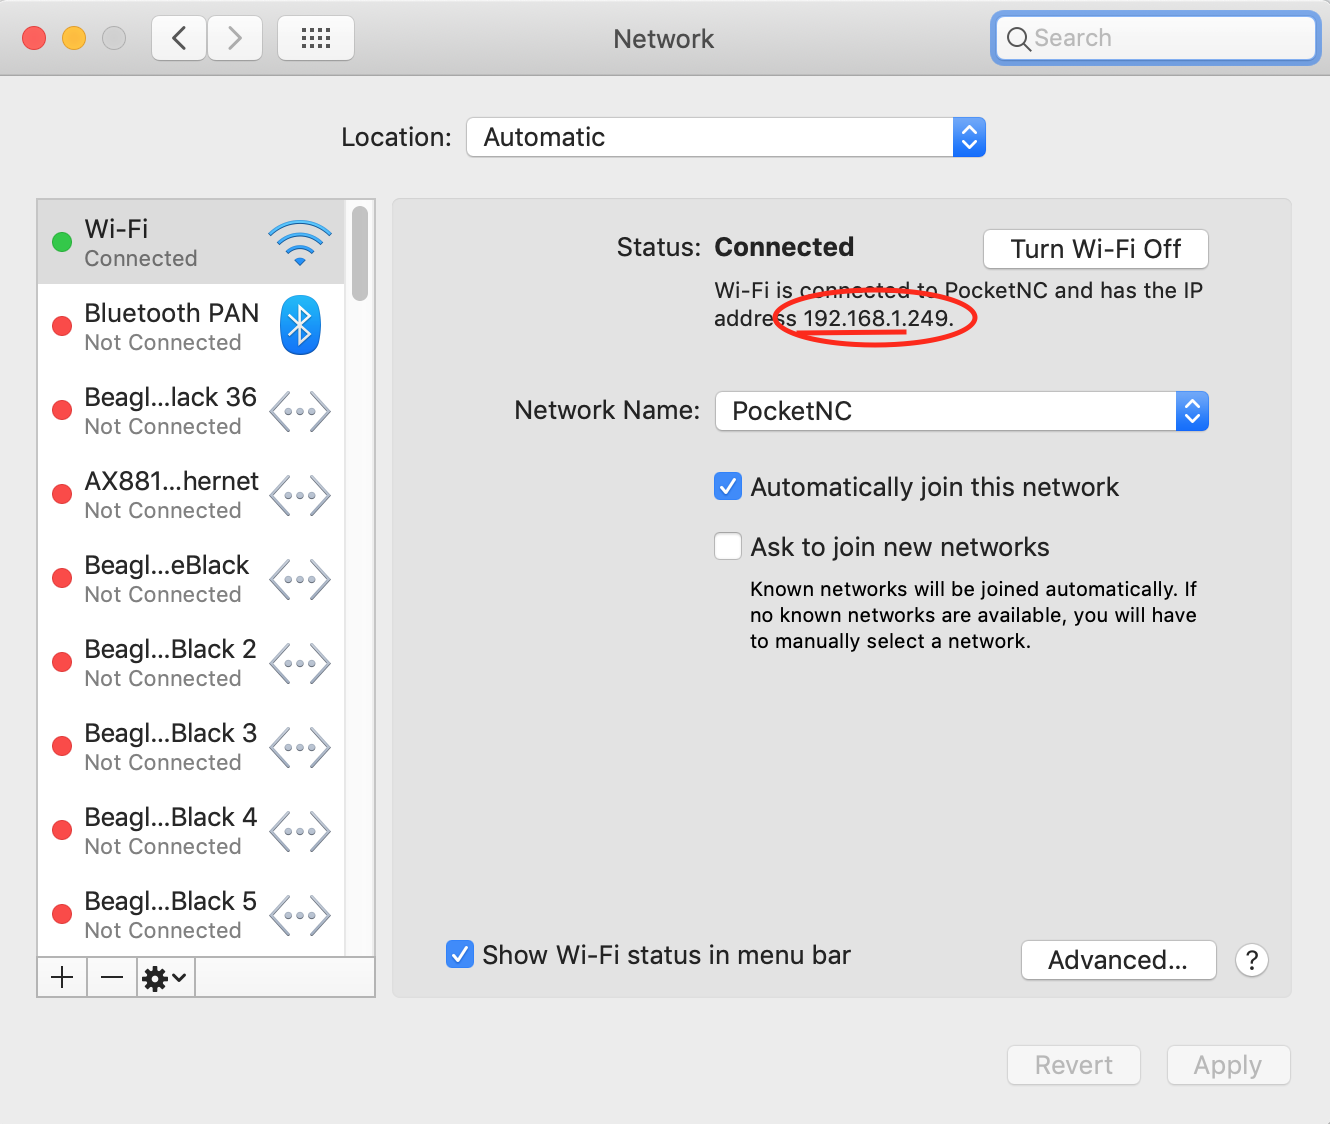
To find this on a Mac, go to System Preferences, then Network. Once in the Network window, shown below, your IP address will be listed under the status of your connection. Take note of the first three segments of this address. For example: “192.168.1”.
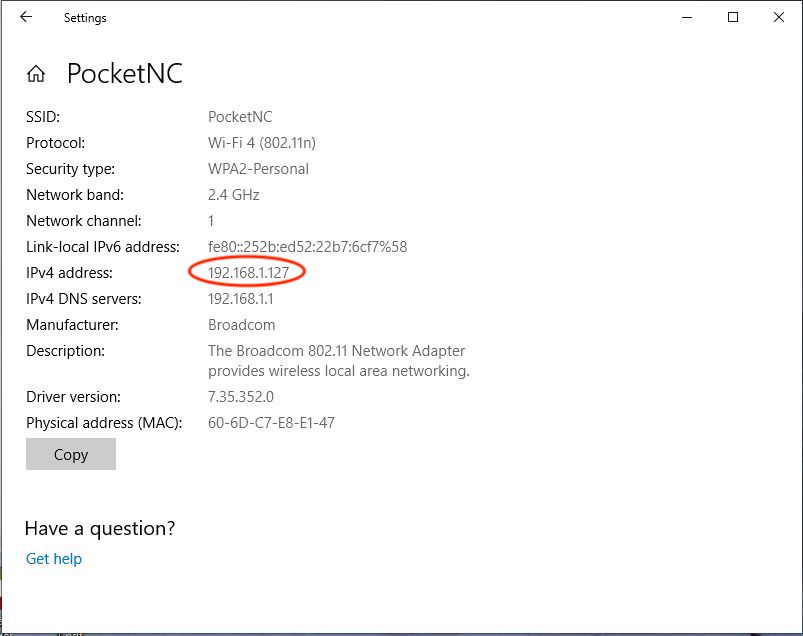
To find your IP address on a Windows 10 computer, follow the path: Windows Button > Settings (gear icon) > Network and Internet > Wi-Fi (or Ethernet) > the connected network. Once you have opened up the information about your network, scroll to the bottom of the page and look for the IPv4 address, again only the first three segments of the address are needed. In this example: “192.168.1”
Step 4: Pocket NC’s Network Connection
Now the Pocket NC needs to be connected to the same network as the computer you plan to run it with. This can be done by sharing a network connection with the machine through your computer, but the best option is to plug the machine directly into a router, modem or wall port (an Ethernet connection) that is connected to the network.
To connect the machine, simply plug an Ethernet cord into one of the items mentioned above and then into the Ethernet port in the front of the machine. It is best to make this connection while the machine is off and then power up the machine using the power switch.
Step 5: Find Pocket NC IP Address
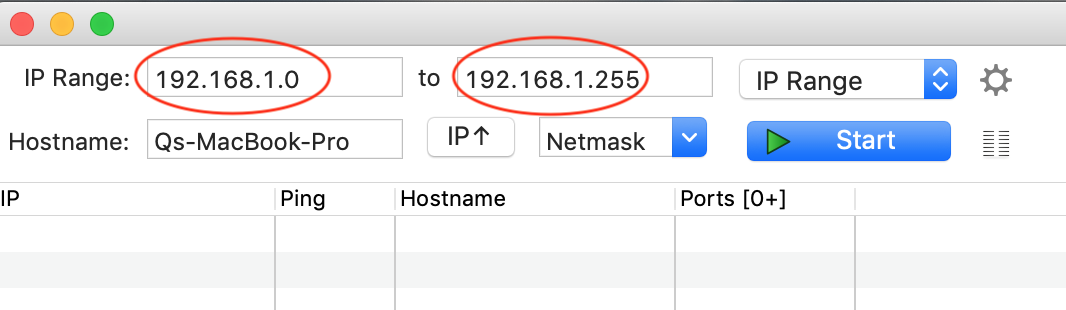
Once the machine has booted up fully and the red E-stop button on the front is blinking, open Angry IP Scanner. Begin by typing the first three segments of your network’s IP address, followed by .0, into the first box of the “IP Range” input. Next, do the same in the second box but this time end the IP address with .255. In this case the first box would read “192.168.1.0” and the second box would read “192.168.1.255”.
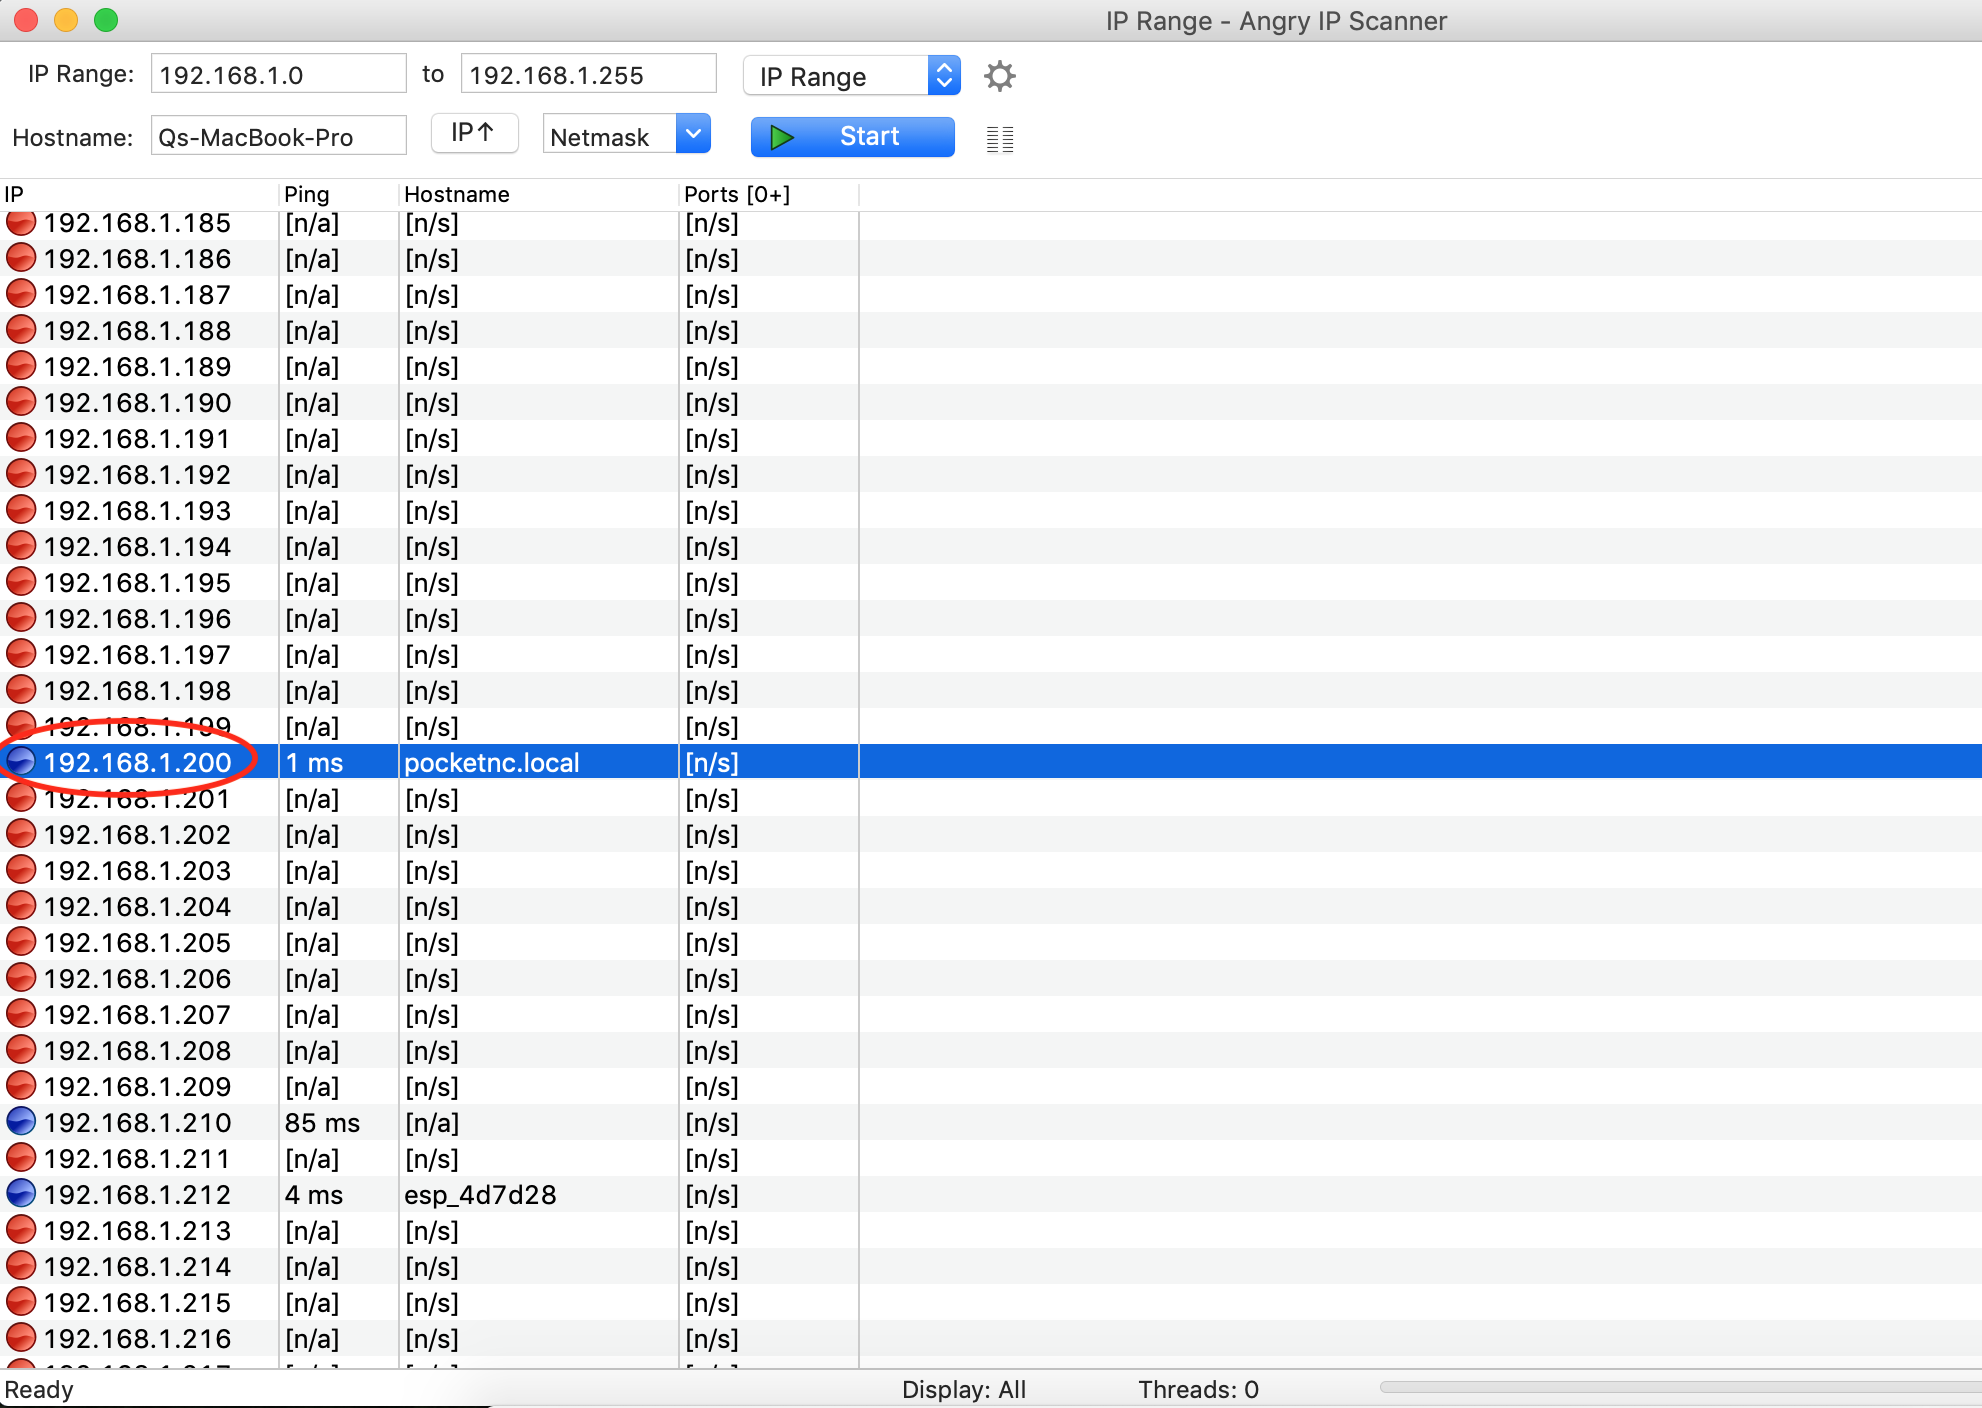
After the range has been input, press the start button. The scanner will ping every IP address in that range and return information on the ones that have been assigned to a device.
Scroll through the results. The IP address assigned to the Pocket NC machine will be the one that says “pocketnc.local” or “pocketnc” in the “Hostname” column. Take note of that IP address. In this example it is “192.168.1.200”.
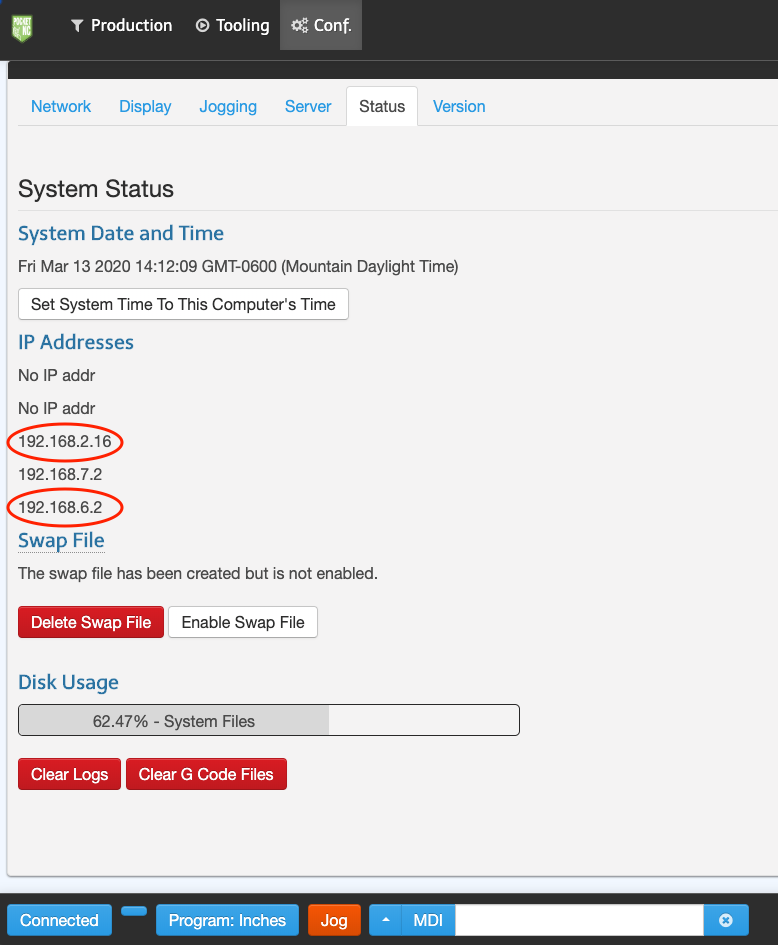
If a USB connection can be established and the Pocket NC user interface can be accessed, the IP address assigned to the machine can be found under the Conf. tab. Navigate to Conf. > Status and then look for any IP address that is not 192.168.7.2.
Step 6: Connect to the Pocket NC
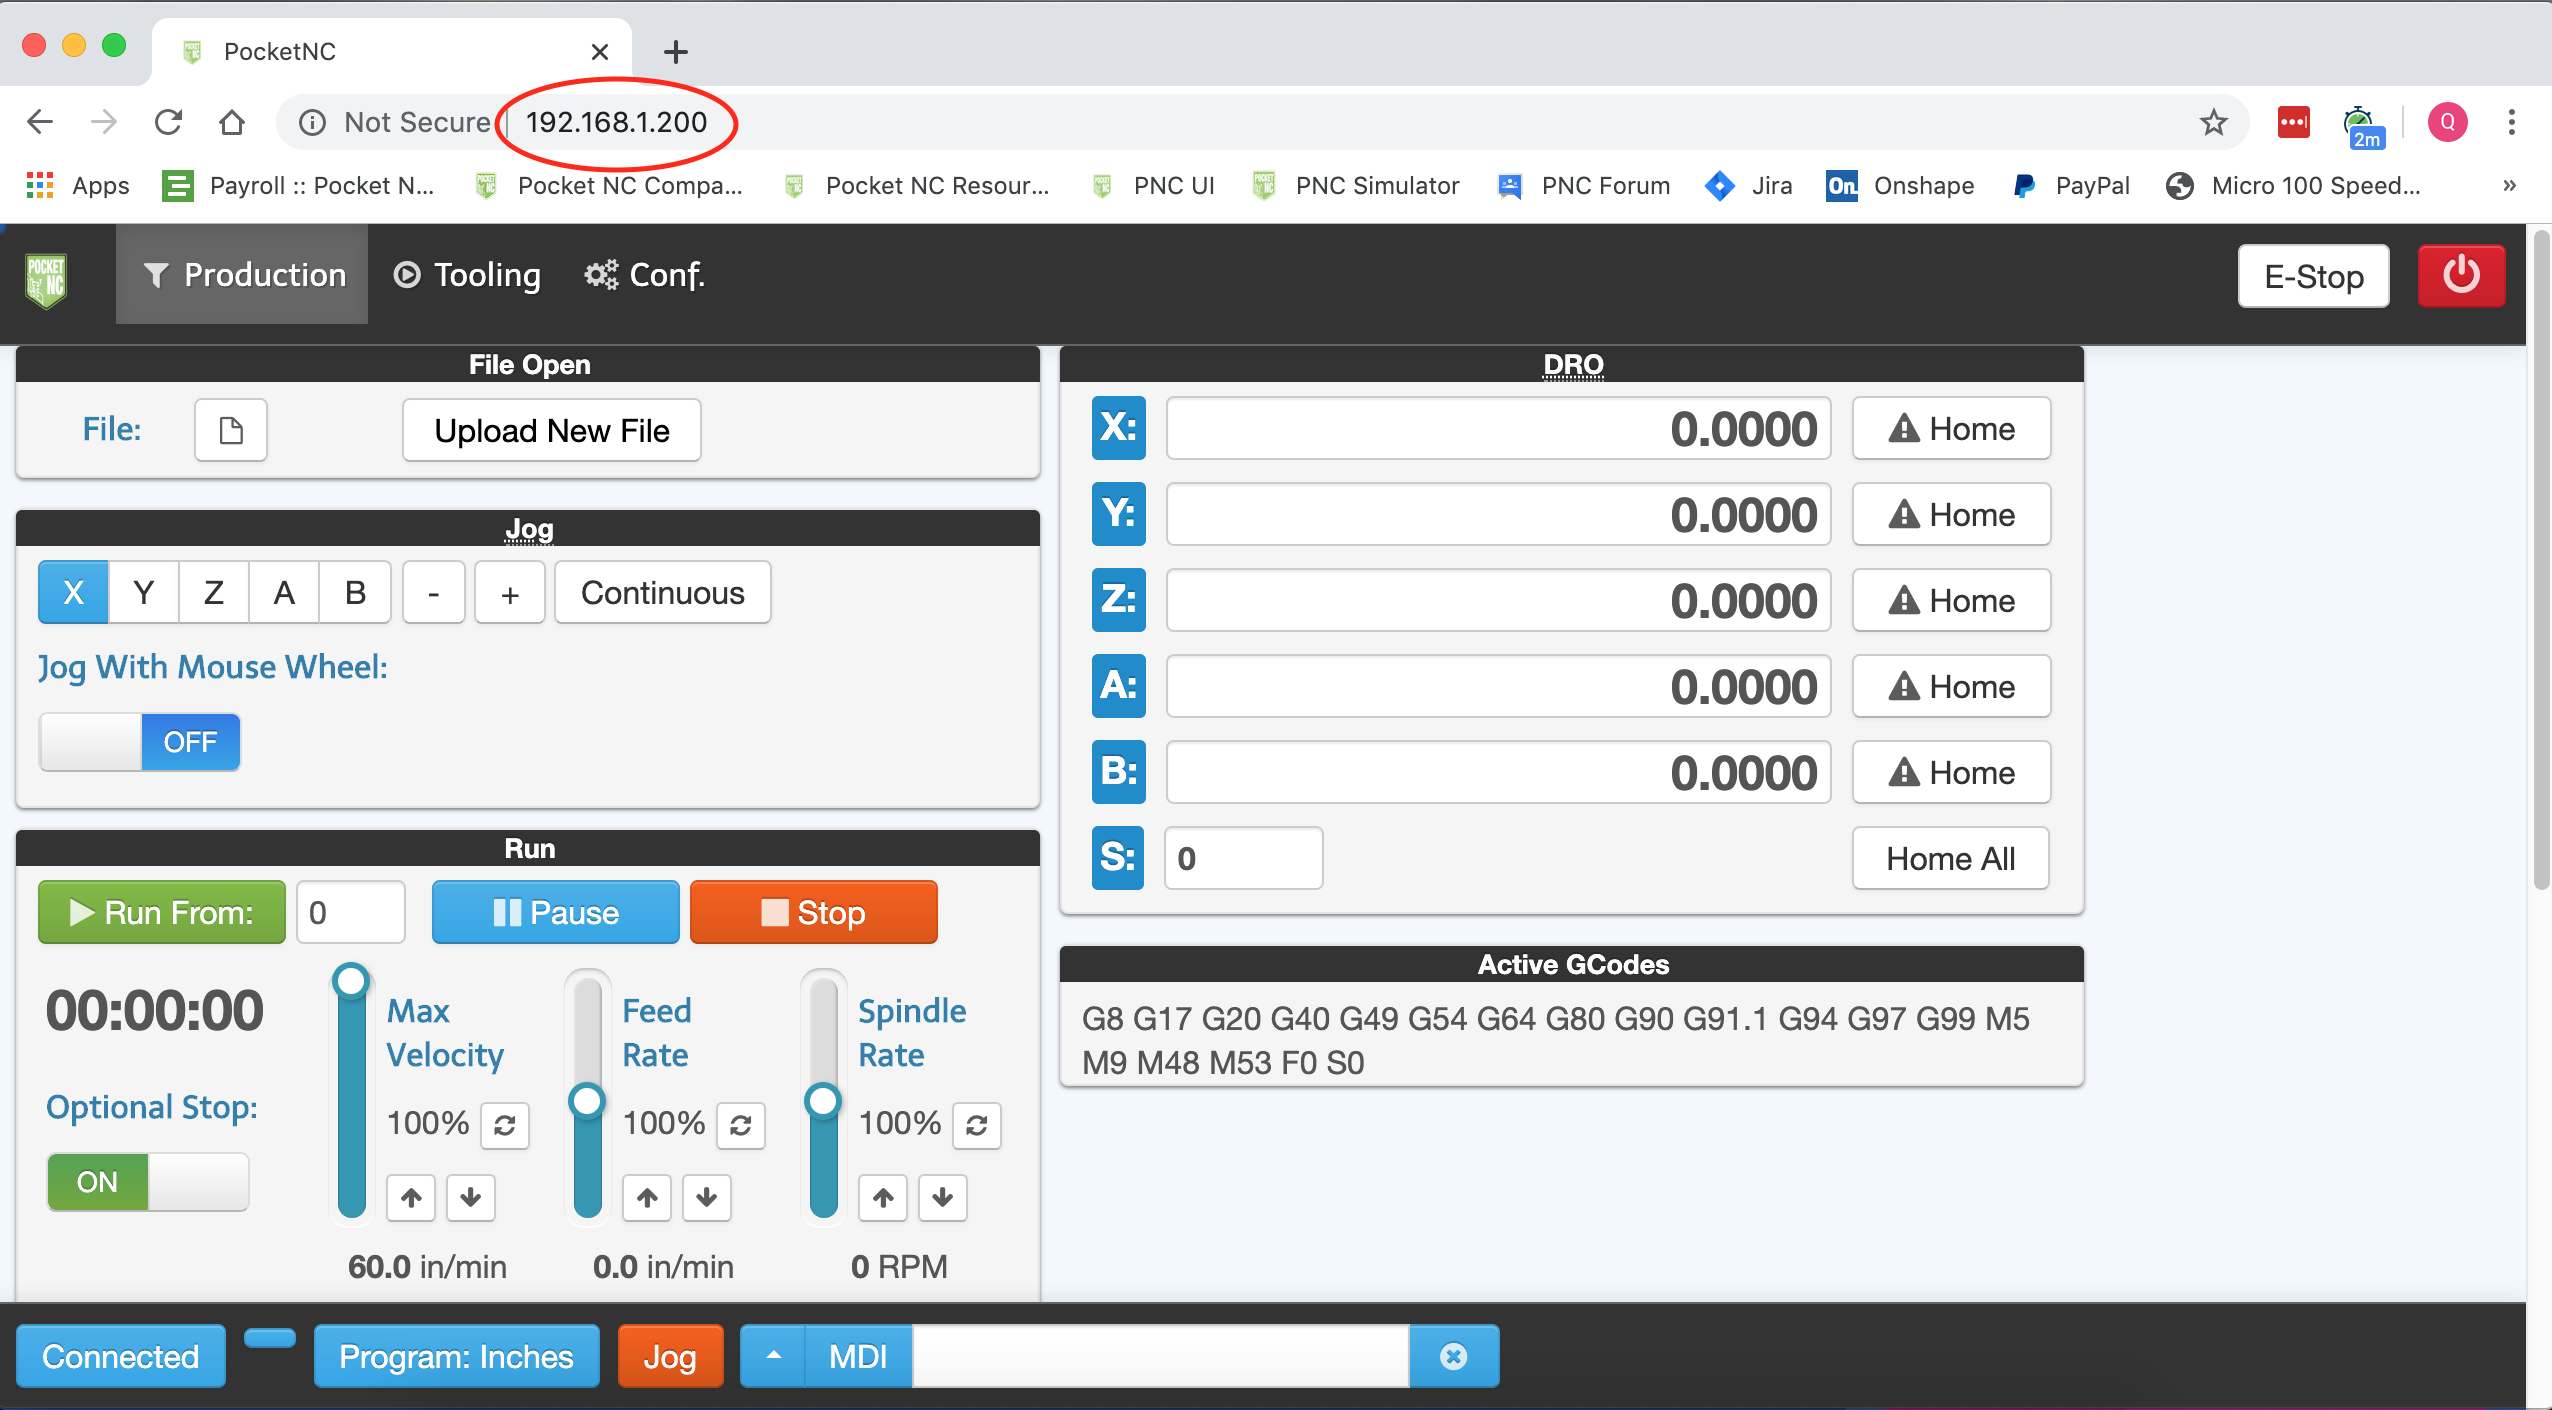
Once the IP address assigned to your Pocket NC has been discovered, it can simply be typed into the URL bar of your browser just like it is done when connecting over USB. Google Chrome, Firefox or Safari are the supported browsers.
Note: Depending on the configuration of the network, this IP address can change over time. If the IP address stops working, you will need to repeat steps 4, 5 and 6.
As mentioned before, some of these steps may differ slightly depending on the exact network setup that is being used.